

Oculus Fan-tastic Crochet Christmas Ornament

A Crochet Pattern by Jeris from Fandom Knitting & Crochet
*This post may contain affiliate links. See my full disclosure policy here.
Nerdy + Christmas = Oculus Ornaments!
When I wanted to fandom-ize my Christmas tree this year, the first thing that came to mind were a pair of round glasses! So…the Oculus ornament was born.
Crocheters often spend loads of time making gifts for family and friends around the holidays, and this could certainly be gifted to a nerdy cousin or bff – but I made this one for ME, and you can make yours for YOU! Go on, you deserve to keep some of your hard work for yourself.
One of the absolute, hands-down favorite fandoms in the Fandom Knitting & Crochet group (FKC Group) is you-know-who, the boy who lived, lighting scarface. Here’s a good place to note that this pattern is a geeky ornament, not associated with any one specific glasses wearer.
Okay, that said – what you’ll find here is a crochet ornament cover pattern that includes FREE written instructions right here on the blog.


Should you want a printable pdf version, which includes a handy-dandy graph of the ornament, you can find that for purchase right here at my Etsy shop: Oculus Pattern PDF Download with Graph.

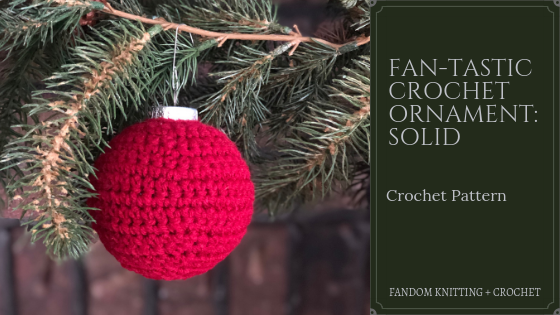
Should you want to make a few solid ornaments to go with the Oculus one, here is the solid version of the Fan-tastic Crochet Ornaments.
Add this pattern to your Ravelry Queue right here.
Pattern for Oculus Fan-tastic Ornaments
The pattern is worked with worsted-weight yarn and a size G-6 crochet hook. You’ll need two colors of yarn – I used Lion Brand Vanna’s Choice in White and Dark Grey Heather. If your gauge is too large or small, just jump down or up a hook size or two. Easy peasy.
The pattern is worked in rows, which will be seamed around the plastic bulb. The top is open enough to fit around the top of the bulb, and the bottom is cinched and the back seam sewn with the yarn needle.
Download the PDF with graph: Oculus Pattern PDF Download with Graph.

Materials:
- Worsted weight yarn (#4) in two desired colors.
- G-6 (4 mm) Crochet Hook. I like Amour hooks
- Approximately 3.4″-diameter (83 mm) shatterproof craft bulbs
- Yarn needle
- Ornament hooks
Gauge:
Approximately 8 stitches & 8 rows = 2″
*Note: These will be stretched around the ornament, and this gauge was calculated after stretched to fit the ornament.
abbreviations:
- ch = chain
- sc = single crochet
- 2sc = create two single crochet stitches in the next stitch
- sc2tog = single crochet two stitches together
- MC = Main Color (pictured in White)
- CC = Contrast Color (pictured in Dark Grey Heather)
Pattern:
The piece is worked in flat rows and will be sewn together at the back when placed around the ornament.
Start with MC until specified to use CC:
Row 1: With MC, Ch 17. Sc in 2nd chain from the hook and in each chain across. (16 sc). Ch 1. Turn.
Row 2: (2sc in first stitch, sc 3) across. (20 sc). Ch 1. Turn.
Row 3: (2 sc, sc 4) across. (24 sc). Ch 1. Turn.
Row 4: (2sc, sc 5) across. (28 sc). Ch 1. Turn.
Row 5: 2sc, sc 6, 2sc, sc 4 CC, sc 2 MC, 2sc MC, sc MC, sc 4 CC, sc MC, 2sc MC, sc 6 MC. (32 sc). Ch 1. Turn.
Row 6: 2sc MC, sc 7, 2sc (1st MC, 2nd CC), sc 4 MC, sc 1 CC, sc 2 MC, 2sc MC, sc CC, sc 4 MC, sc CC, sc MC, 2sc MC, sc 7 MC. (36 sc). Ch 1. Turn.
Row 7: 2sc MC, sc 7 MC, 2 sc MC, sc CC, sc 6 MC, sc CC, 2sc MC, sc MC, sc CC, sc 6 MC, sc CC, 2sc MC, sc 6 MC, 2sc MC. (40 sc). Ch 1. Turn.
Row 8: sc 7 MC, sc 4 CC, sc 6 MC, sc CC, sc 3 MC, sc CC, sc 6 MC, sc 4 CC, sc 8 MC (40 sc). Ch 1. Turn.
Row 9: sc 11 MC, sc CC, sc 6 MC, sc 5 CC, sc 6 MC, sc CC, sc 10 MC. (40 sc). Ch 1. Turn.
Row 10: sc 10 MC, sc CC, sc 6 MC, sc CC, sc 3 MC, sc CC, sc 6 MC, sc CC, sc 11 MC. (40 sc.) Ch 1. Turn.
Now begin decreasing as follows:
Row 11: sc2tog MC, sc 7 MC, sc2tog MC, sc MC, sc CC, sc 4 MC, sc CC, sc MC, sc2tog MC, sc 2 MC, sc CC, sc 4 MC, sc CC, sc2tog MC, sc 9 MC. (36 sc). Ch 1. Turn.
Row 12: sc2tog MC, sc 7 MC, sc2tog MC, sc 4 CC, sc 3 MC, sc2tog MC, sc MC, sc 4 CC, sc 2 MC, sc2tog MC, sc 7 MC. (32 sc.) Ch 1. Turn.
Row 13: With MC, (sc2tog, sc 6) across. (28 sc). Ch 1. Turn.
Row 14: With MC, (sc2tog, sc 5) across. (24 sc). Ch. 1. Turn.
Row 15: With MC, (sc2tog, sc 4) across. (20 sc). Ch 1. Turn.
Row 16: With MC, (sc2tog, sc 3) across. (16 sc). Ch 1. Turn.
Row 17: With MC, (sc2tog, sc 2) across. (12 sc). Ch 1. Turn.
Row 18: With MC, (sc2tog) across. (6 sc).
Finishing:
Cut the yarn, leaving a long tail to sew the ornament seam. I leave about 18″ of yarn just to be safe.
Weave in the loose end at the beginning of your piece.
Using the long tail from where you fastened off, draw the yarn through the remaining 6 stitches, cinching them up.
Place the crochet piece around the plastic ornament. NOTE: You’ll need to pull the crochet piece to stretch around the ornament. You want the stitches to be taught.
Sew the back seam of the ornament. I like to use whipstitch, but you can seam any way you like.

Let’s Connect!
If you have any questions about the pattern or supplies, or you just want to talk fandom, knitting, or crocheting – or share your project photos (or even to request a fandom themed project), join me in the free, private facebook group “Fandom Knitting & Crochet – Group.” I’d love to see you there!
You should also hop over to the sidebar and subscribe to the newsletter to keep up to date on all the new patterns.
If you make this project, share it with me on Instagram: @fandom.knitting.crochet.
Thanks for checking out the pattern!


